Makers Workshop
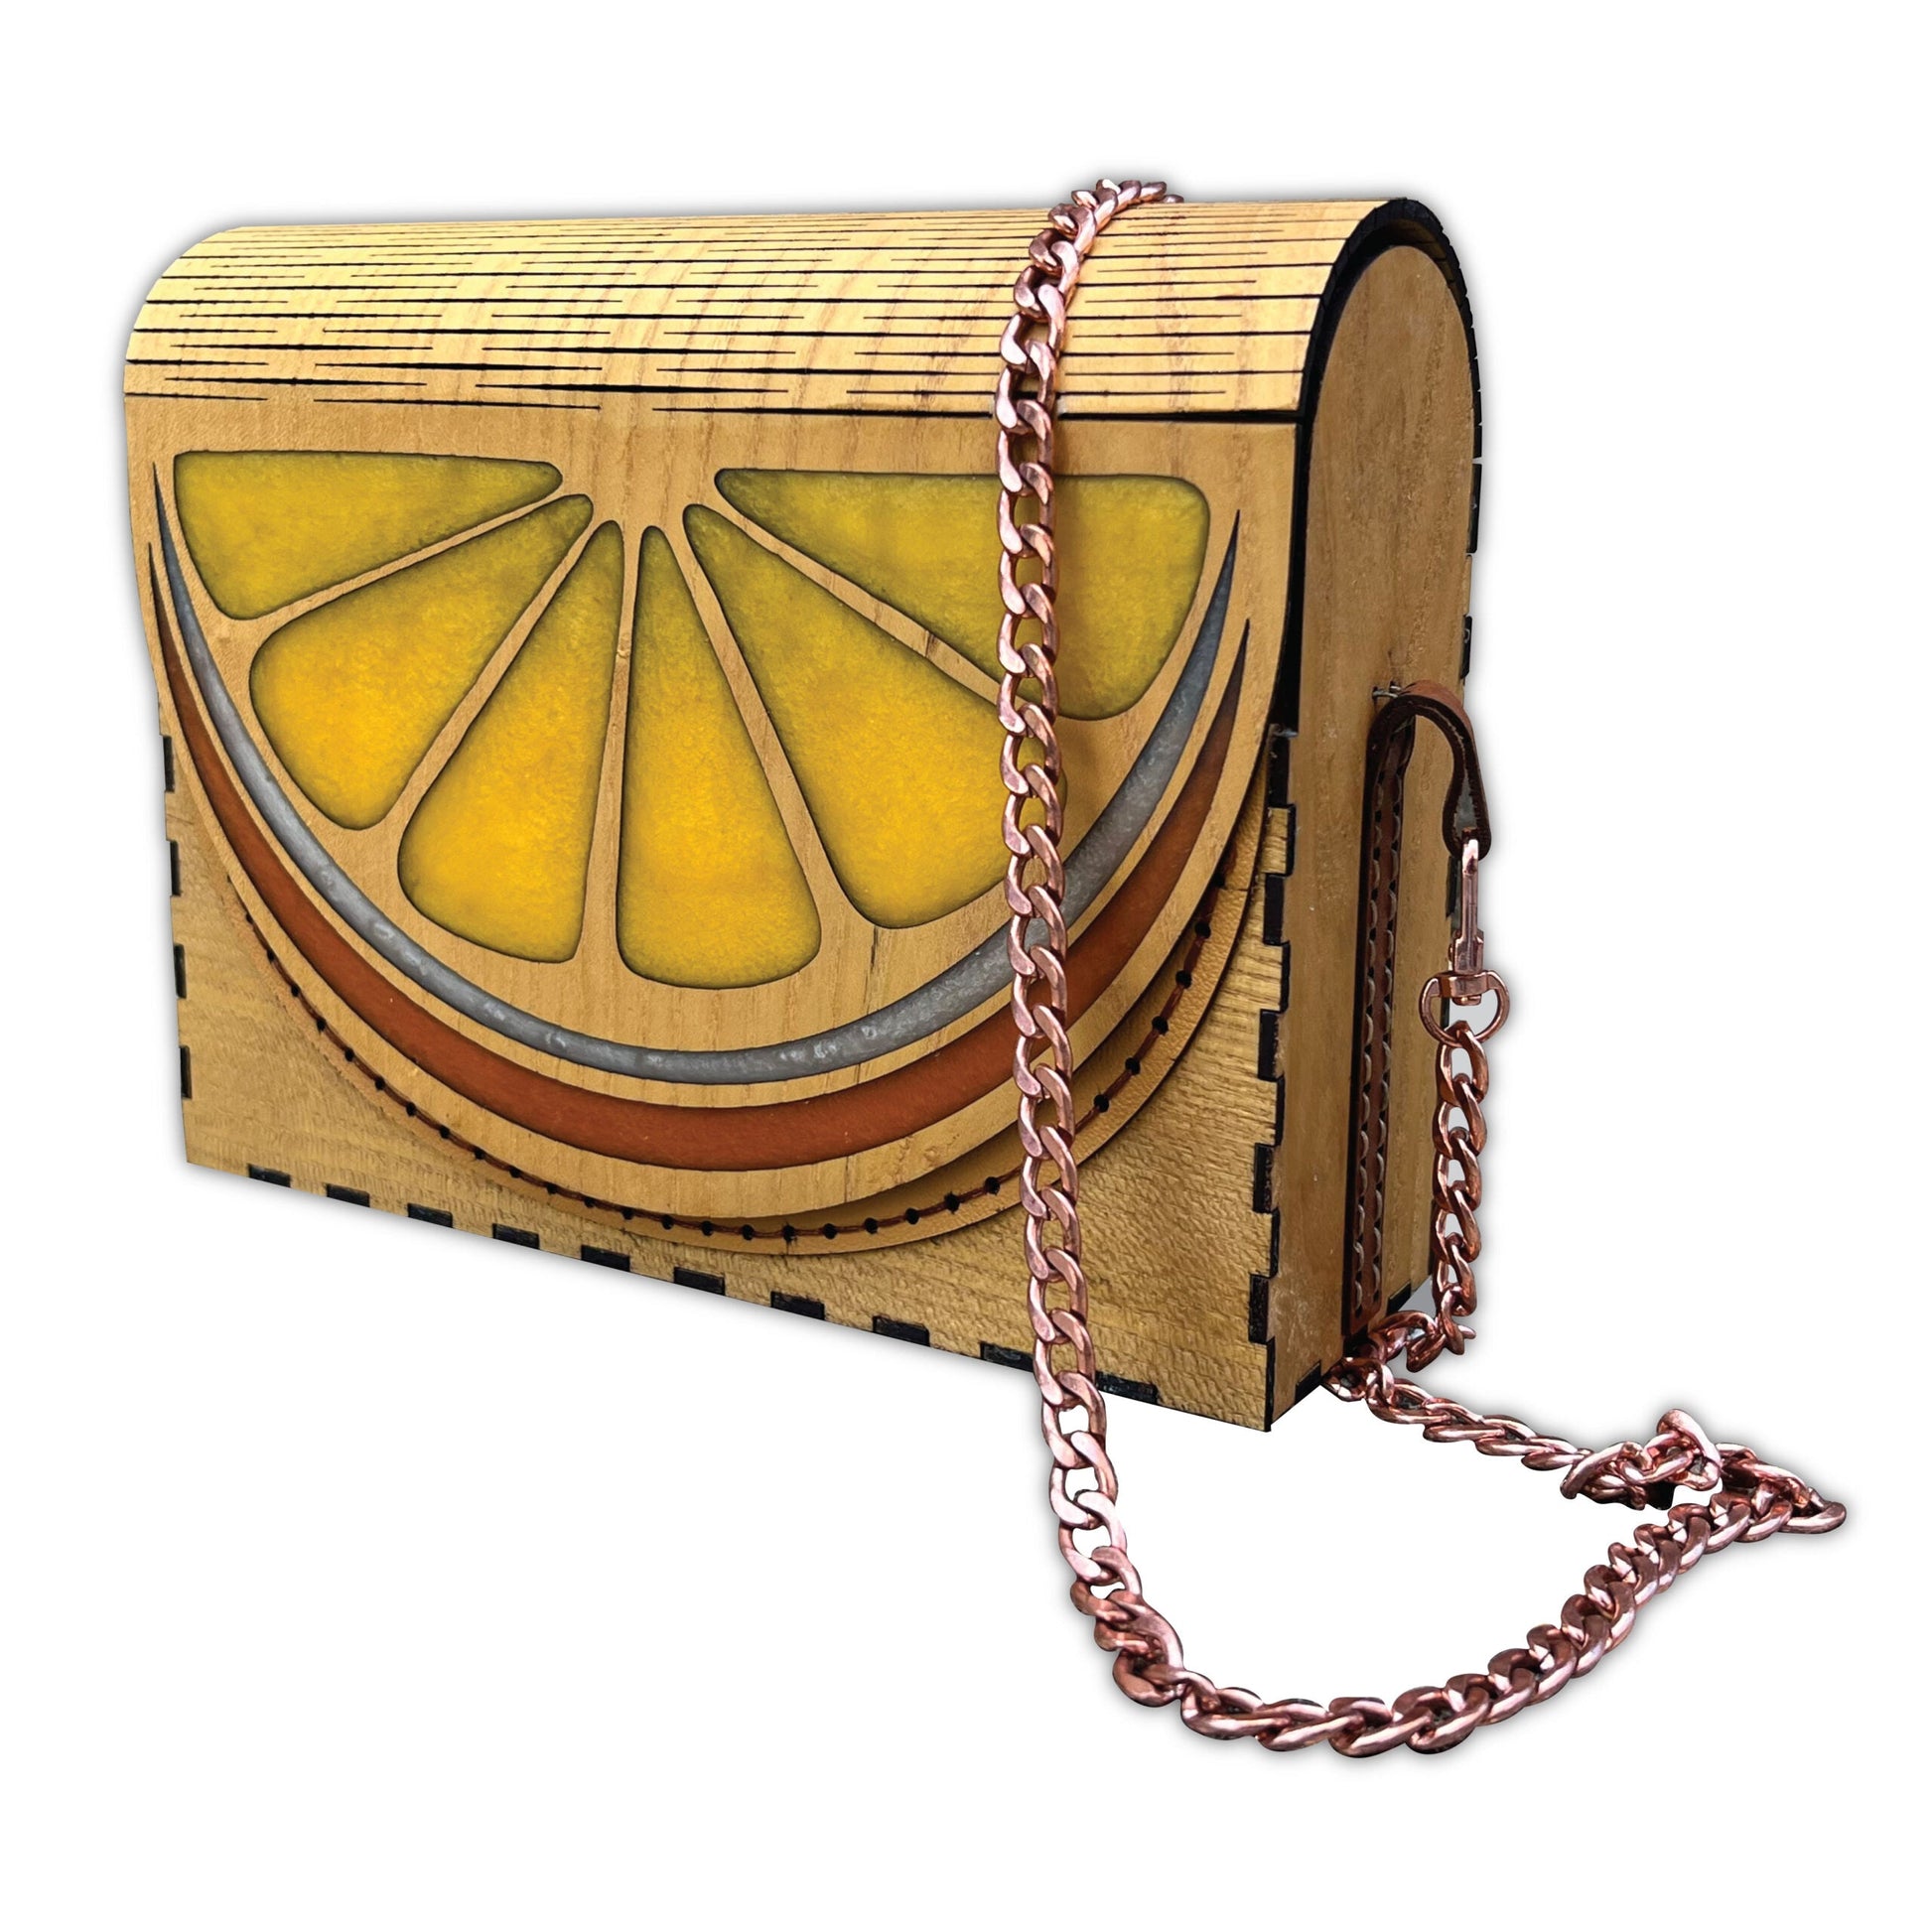
Laser Cut Citrus Handbag Downloadable Files
Laser Cut Citrus Handbag Downloadable Files
Couldn't load pickup availability
Share

-
Project Notes
Step 1: Sand you laser ready solid hardwood sheets of choice and apply masking material to both sides. Laser cut each wooden piece.
Step 2: If you are choosing to do the resin pour, remove masking material off of one side of the fruit slice section. Firmly apply more masking material over the existing unpeeled masking on the back side to create a “bottom” to this make shift resin mold. You may also want to add masking material over the living hinge to protect it from any resin spills during this step. To seal your grain apply a thin layer of clear epoxy to all interior seams with a sponge brush. Let harden completely before pouring colored resin pours. Once those pours harden remove all masking and sand resin until it is flush to the wood.
Step 3: Apply finish of choice to both sides of all wood pieces. Avoid applying finish to interior box joints if possible by creating a barrier with painter’s tape. Finish on the box joints will interfere with the glue up and reduce durability of the handbag. Let finish cure completely. I highly recommend reapplying tape to the box joints after the finish sets to keep them protected during the assembly process.
Step 4: Select your leather, protect it with masking material on both sides, and cut each leather pattern from it. Remove masking.
Step 5: Line each leather piece up with its corresponding wood piece and stitch each section down using waxed thread and your stitching pattern of choice. The handles fold over onto themselves and are stitched in at the same time as the interior lining. For a detailed look at how to assemble, watch the full video of this project being assembled.
Step 6: Add 6 mm earth magnets to the engraved circled on the front and back wood panels using epoxy. Make sure you have them secured in the proper position so the two pieces are attracted to each other and will snap and hold.
Step 7: Apply a drop of waterproof wood glue to each box joint and assemble the purse. Use a combination of painter’s tape and clamps to apply pressure as the glue dries.
Step 8: Once dry, remove clamps and fold the top flap over until the magnets lock together… and tah dah! You’re all done.
-
Suggested Materials
1/8″ 12×20″ Solid Wood Laser Ready Sheet x1, available here: https://makersworkshop.com/shop
1/8″ 6×12″ Solid Wood Laser Ready Sheet x2, available here: https://makersworkshop.com/shop
Leather
Waxed Thread
6mm Earth Magnets, x6
Wood Glue
Resin (Optional)
Resin Pigments (Optional)